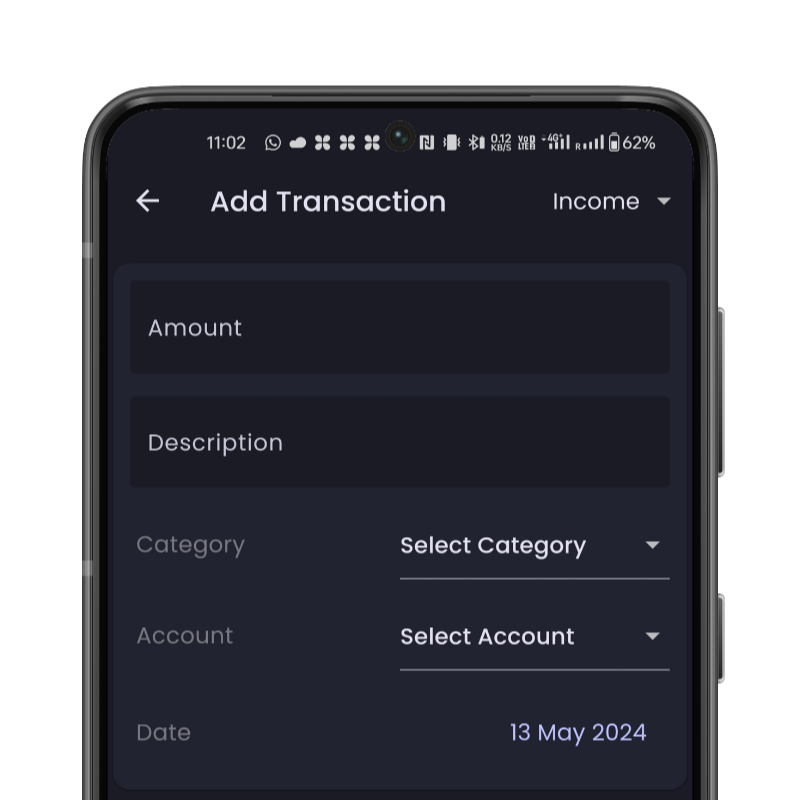
Managing your finances effectively starts with accurately tracking your income and expenses. In this blog post, we’ll walk you through the process of adding transactions in your balance money manager app, helping you stay on top of your financial health with ease.
Step 1: Open Balance Money Manager App
Launch your balance money manager app on your device. If you haven’t already installed one, you can download from Google Play Store.
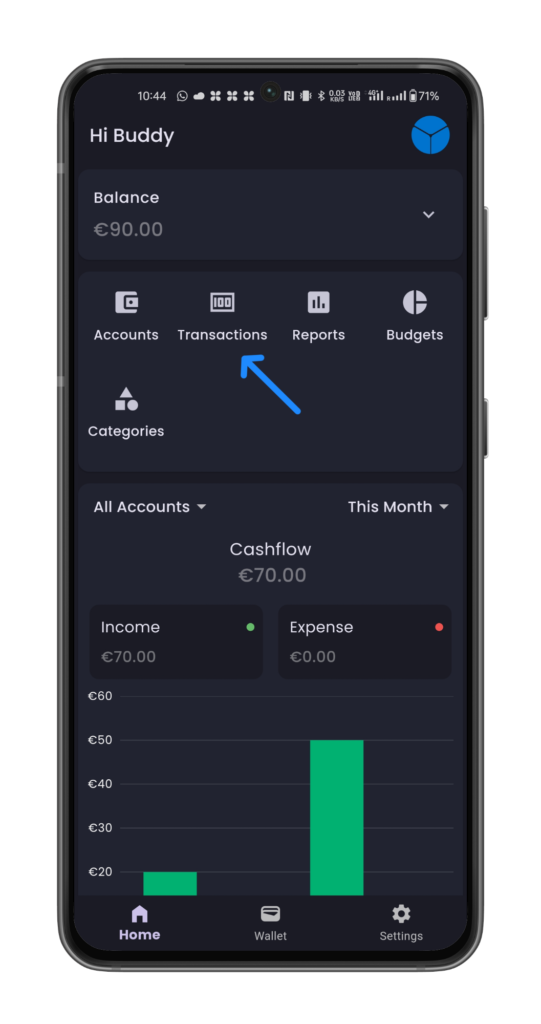
Step 2: Navigate to the Transactions Section
Once the app is open, navigate to the transactions section. You can see the transactions tab in home page.
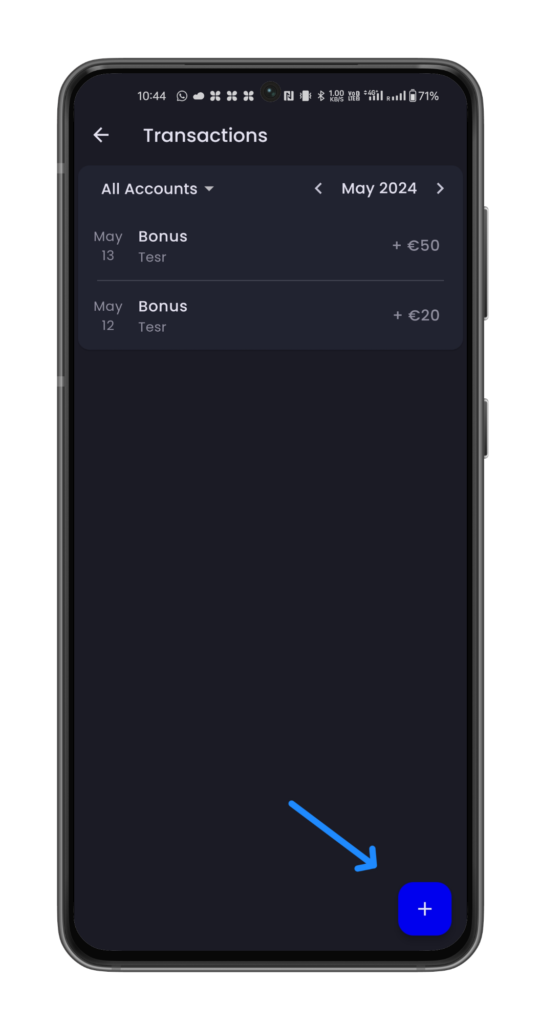
Step 3: Tap on the “Add Transaction” Button
Within the transactions section, you’ll find the “Add Transaction” button represented by a plus (+) sign or a similar label. Tap on this button to initiate the process of adding a new transaction to your records.
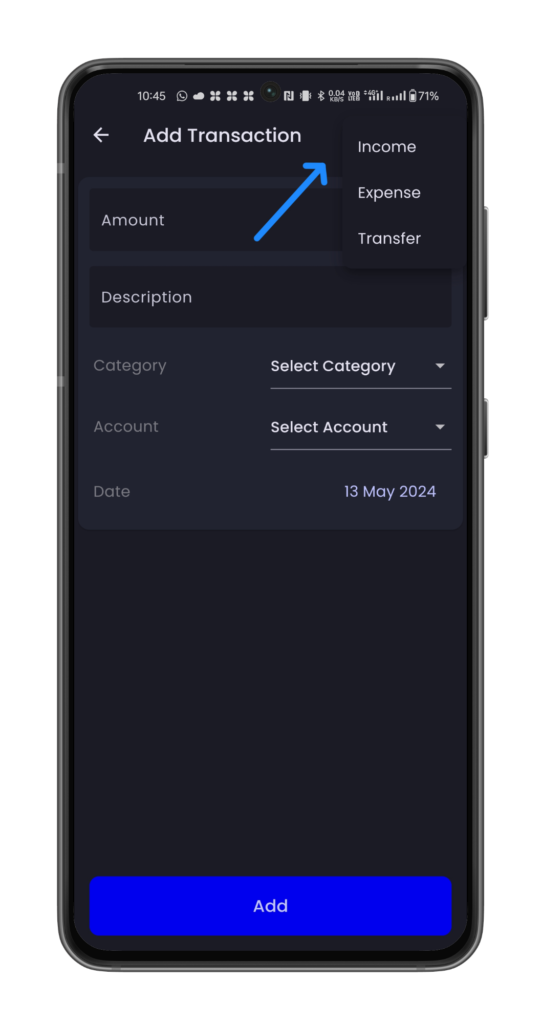
Step 4: Select Transaction Type
After tapping on “Add Transaction,” you’ll be presented with a form where you select the transaction type whether it’s income, expense or transaction
Step 5: Enter Transaction Details
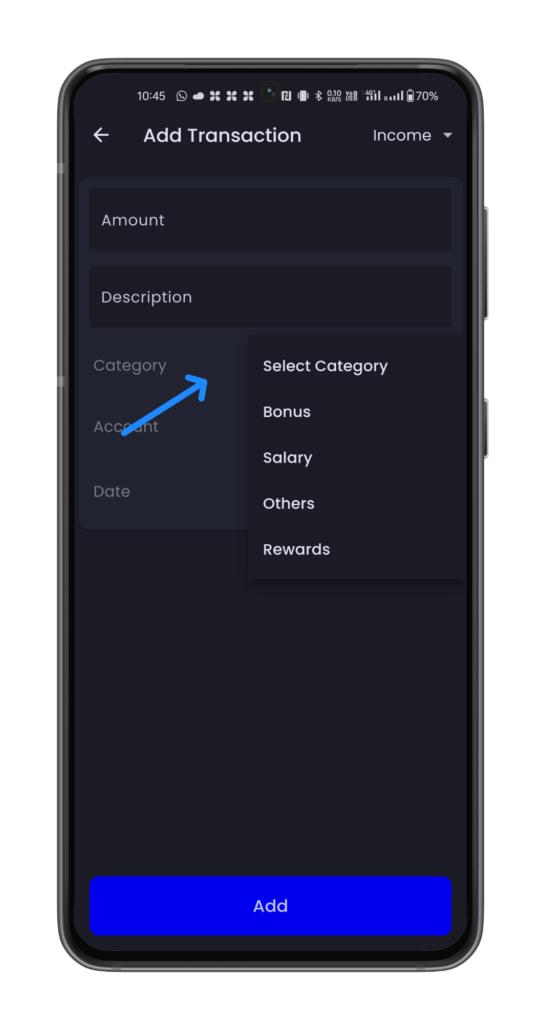
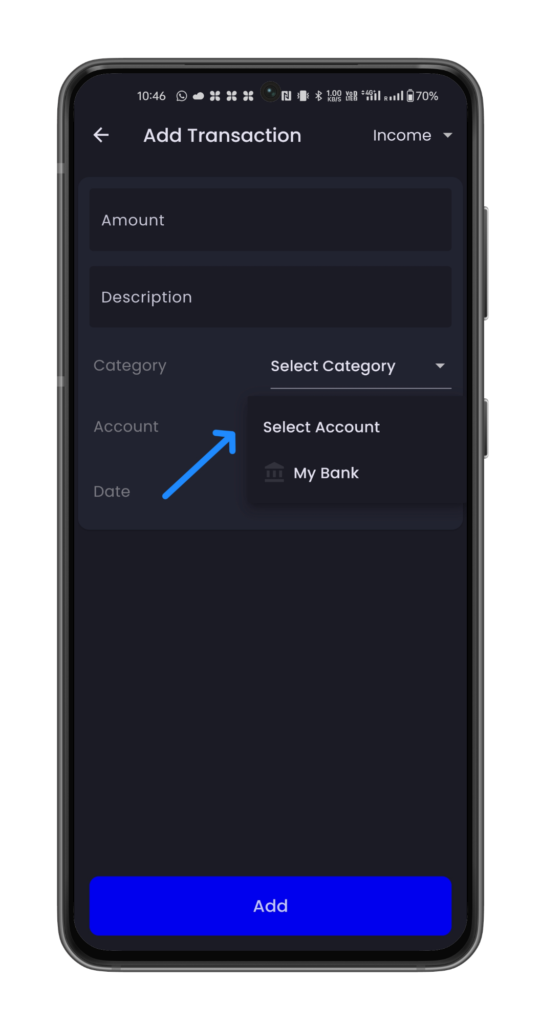
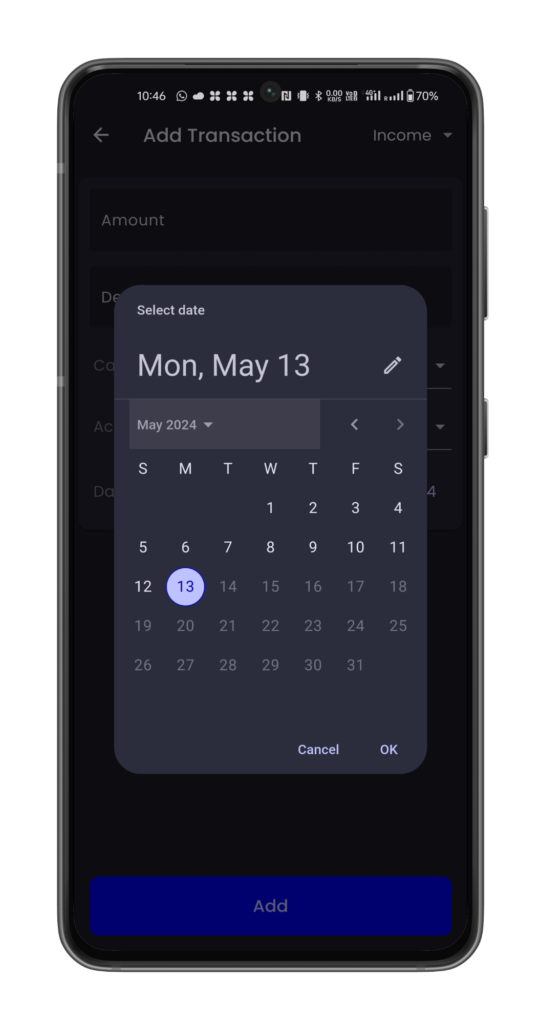
After tapping on “Add Transaction,” you’ll be presented with a form where you can input the transaction details. Here are the common fields you’ll encounter:
- Date: Select the date of the transaction from the calendar picker. You can choose the current date or adjust it as needed.
- Category: Choose the category to which the transaction belongs. Categories may include groceries, transportation, utilities, entertainment, etc.
- Amount: Enter the amount of the transaction. This can be a positive number for income or a negative number for expenses.
- Description (Optional): Provide a brief description or note about the transaction for future reference.
- Payment Account: Specify the payment method used for the transaction, such as cash, credit card, or online transfer.
Step 6: Save the Transaction
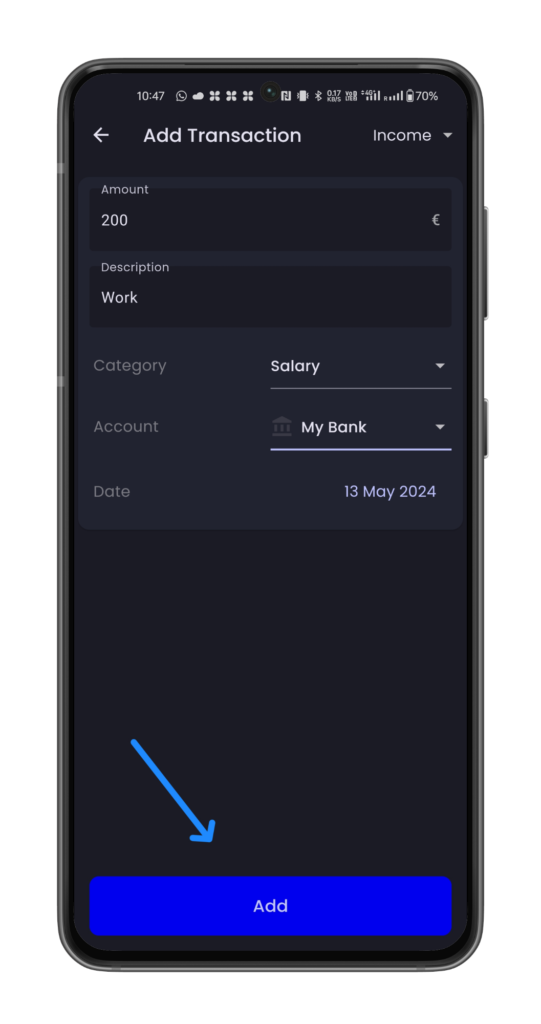
Once you’ve entered all the relevant details of the transaction, review them to ensure accuracy. Double-check the date, category, amount, and any additional information you’ve provided. If everything looks correct, proceed to save the transaction by tapping on the “Save” or “Add” button.
Step 7: Repeat for Additional Transactions
If you have multiple transactions to add, you can repeat the above steps for each one. Simply navigate back to the transactions section and tap on the “Add Transaction” button to initiate the process again.
Conclusion:
Adding transactions in your balance money manager app is a simple yet essential task for effectively managing your finances. By following the step-by-step guide outlined above, you can accurately track your income and expenses, gain insights into your spending habits, and make informed financial decisions for a brighter financial future. Start adding transactions today and take control of your financial well-being!
